Login / Register
Vulcathene Saddle Clamps

Useful Information
What is a Vulcathene Saddle Clamp used for?
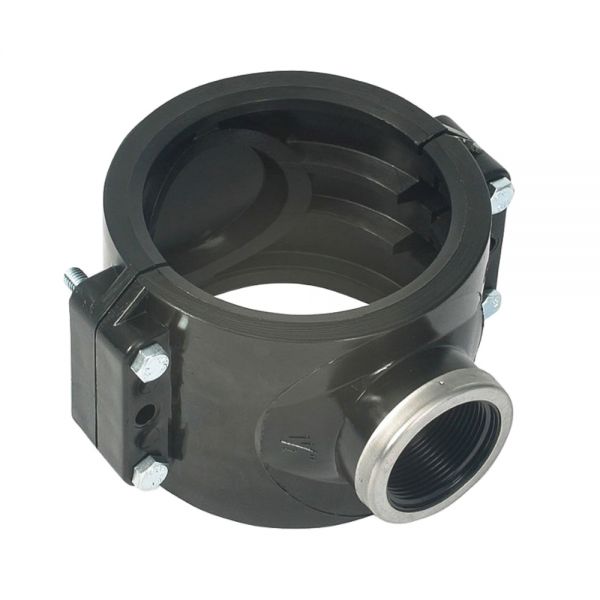
The Vulcathene Saddle Clamp is a highly functional fitting designed to facilitate the easy addition of new branch pipes to existing Vulcathene drainage stacks. This innovative solution simplifies the process of expanding or modifying laboratory drainage systems without the need for extensive alterations. The clamps come with a BSP female threaded outlet, making them versatile for various installation requirements.
Key Features
- Easy Installation: Enables the straightforward connection of branch pipes to existing stacks, significantly simplifying system expansions or modifications.
- Secure Sealing: Equipped with nitrile seals to ensure a tight and leak-proof connection, maintaining the integrity of the drainage system.
- Durable Construction: Features zinc-plated hardware and is made from robust materials in a charcoal grey colour, ensuring longevity and resistance to laboratory conditions.
- Versatility: Available in four sizes, with the 76mm saddles supplied with 4 bolts and the 102mm saddles with 6 bolts, catering to various pipe dimensions.
- Compatibility: For connection to 38mm and 51mm Vulcathene pipes. Use with Vulcathene Mechanical or Enfusion male BSP adapters for a seamless fit.
Specifications
- Product Codes: V465050, V465060, V465070, V465080
- Available Sizes: 76mm x 1 1/2", 76mm x 2", 102mm x 1 1/2", 102mm x 2"
- Approvals: BBA 24/7091
- Temperature Range: Suitable for temperatures from -20°C to +100°C.
- Applications: Laboratory drainage.
How to Install Vulcathene Mechanical Fittings
Creating a secure mechanical joint with Vulcathene fittings involves a precise and methodical process to ensure optimal joint integrity and system performance. Follow these steps for installation:
- Cutting the Pipe:
- Use a rotary plastic pipe cutter for a clean, burr-free cut. Clamp the pipe to avoid distortion.
- Ensure the cut is square. If a hacksaw is used, remove all burrs and loose material.
- Groove the pipe using the appropriate grooving tool for the tongued olive to fit in.
- Grooving:
- Insert the pipe fully into the grooving tool.
- Adjust the blade depth to about half and rotate the tool anti-clockwise around the pipe.
- Increase the blade to full depth, continue rotating, then remove the tool and clear any swarf.
- Assembling the Joint:
- Slide the nut onto the pipe, with the threaded side facing the groove.
- Insert the olive (widest end first) into the groove. Use Vulcathene lubricant for ease, especially with larger sizes.
- Ensure the olive is correctly seated and the fitting thread is clean. Apply lubricant to the fitting threads.
- Loosely assemble the joint and hand-tighten the nut using two Vulcathene spanners, then tighten fully to ensure a secure fit.
Note:
- Tighten nuts progressively during installation, not all at once at the end.
- Use the Vulcathene grooving tool and spanners to guarantee the joint's integrity.
For detailed instructions, it's crucial to refer to the Vulcathene Installation Guide.


